A group with members must exist before a schedule can be created. This section help the users to add schedule to a group:
- Click on Groups & Schedules in the menu bar, select the corresponding group.
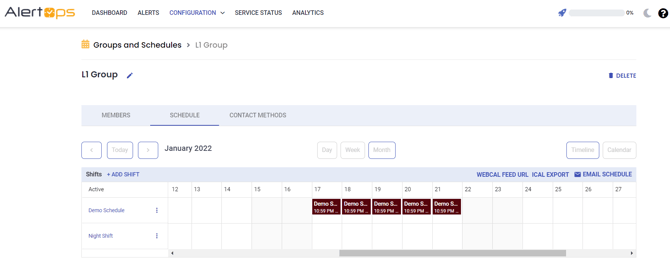
- Click the Schedules tab to view the existing shift details and add new
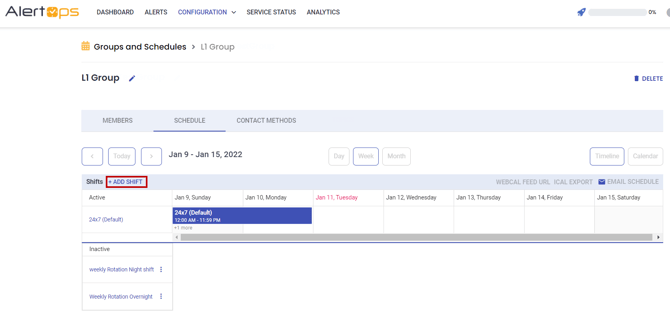
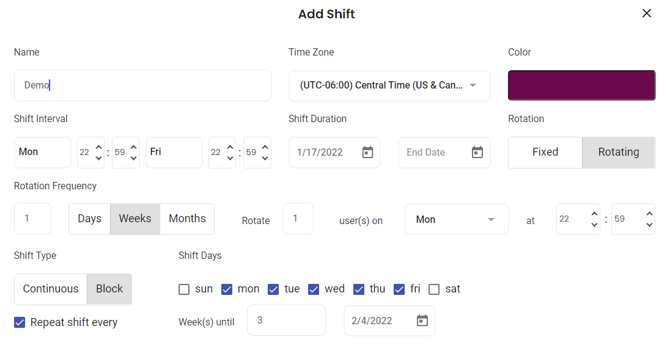
Click +Add Shift, a window opens to add shift details

- Enter a Schedule Name. Each schedule must have its unique name within the group.
- Select a Time Zone from the dropdwn,
- Choose a Colour to represent the schedule on the Group Calendar.
- As a best practice, choose contrasting colours to distinguish between schedules on the calendar view.
- Select a Shift Interval and Shift Duration to set start and end the schedule shift.
- A typical example would be a schedule to cover on-call hours during the week, setting the start time for EOB on Monday and the end time for the start of business on Friday. Such a schedule will only be active each evening during the defined hours.
- Check the Continuous option to create a schedule without a break in the shift. This produces 24-hour coverage during the defined period.
- Select a schedule Type.
- A Fixed schedule contains the same fixed team members over a defined schedule period.
- For Fixed schedules, you can set a schedule to be in effect always (perpetual) or for a specified period. To set a perpetual schedule, select the No Start Date radio button. Otherwise, enter a Start Date and End Date for the schedule.
- A Rotating schedule allows you to automatically move users between Primary, Secondary, and Off (blank) roles.
- For Rotating schedules, you must enter a Start Date and End Date. This allows for periodic review of the rotation and is commonly set for six months or a year. You must also set a Rotation Frequency to determine when and how many group members rotate in the schedule.
- A Fixed schedule contains the same fixed team members over a defined schedule period.
- In the Advanced Settings section, you may select specific days for which the schedule will affect. Additionally, you can check the Repeat Schedule option for rotating schedules to repeat the rotating schedule every [x] number of weeks.
- For Fixed schedules, when the All-Group Users option is checked, the schedule will be in effect for everyone in the group. Add specific users to the schedule by unchecking the All-Group Users option.
- For Rotating schedules, you must always add users to the schedule manually. To Schedule Users, click and drag users into the Users in Schedule box. Then, set the sequence and select a member role for each user in the schedule. A best practice is to set the top member in the list as Primary to align with the start date of the rotation.
- Click Submit, the schedule details are saved and auto updated in the group Calendar