If a user doesn't find the required workflow, a new workflow can be designed by building your own flows, messages and responses.
Part 1: Workflow Details
- Navigate to Configuration -> Workflows, the existing workflows are displyed
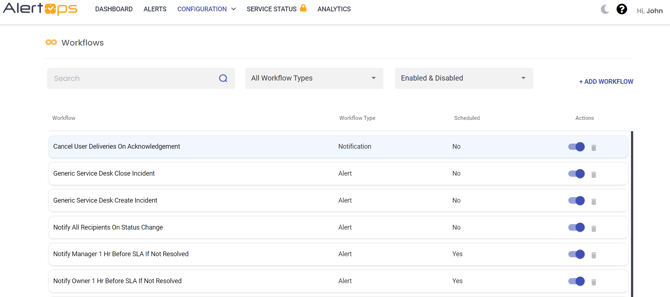
- Click + ADD WORKFLOW

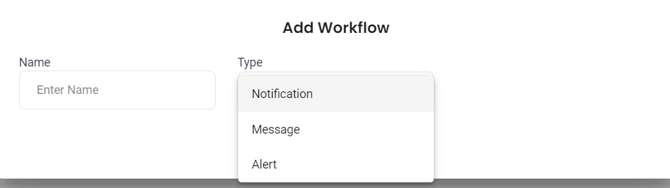
- Enter Name for the workflow. This must be a unique name to describe the workflow.
- Select Type. There are three Workflow Types: Alert, Message, and Notification.
- The Alert type is the most commonly used.
- The Message type is an individual message that is used for system Workflows.
- The Notification type is used to track the delivery of notifications (whether a notification has delivered, been acknowledged, and more).
- Based on the Type selected, you may select an Alert Type.
- Alert Types for Alert Workflows are defined under Administration > Custom Alert Fields. The Alert Type will designate which custom fields are available for the Workflow.
- Check the Scheduled box if a workflow requires a time-based escalation. A Recurrence Interval may be configured once the Scheduled checkbox is selected. Stop conditions become available once a Recurrence Interval is configured. Scheduled Workflows with Recurrence must have a Start and Stop condition, and an Action.
- Click Submit, the workflow is created as shown below
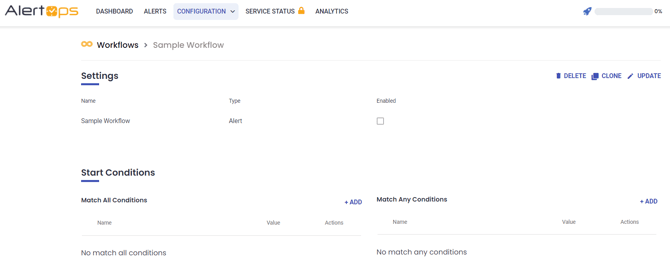
- Select Enabled checkbox to set the status to 'On' only after creating one Condition and one Action for the Workflow.
- Click Update to add conditions and actions to the Workflow.
Part 2: Conditions
Start Conditions control the conditions under which the Workflow will trigger. Stop Conditions control the conditions under which the Workflow will stop. By default, Stop Conditions are not visible unless a workflow has a recurrence interval.
Add a Start Condition
- Click Add on the Workflow page.
- In the Attribute drop-down menu, select Standard or Template. Standard Attributes are pre-built by AlertOps. Template Attributes are user-created.
- Select an Attribute Name. Standard attribute names include:
- Complete Delivery: All deliveries have been sent to all Recipients
- Topic: Alert Topic
- Owner: Alert Owner
- Template: Alert Template
- TimeAfterSLA: Minutes after the alert Target SLA Date
- TimeBeforeSLA: Minutes before the alert Target SLA Date
- TimeFromBeginning: Minute from the Alert creation time
- AlertPriority
- AlertStatus
- Source
- SourceName
- Select a logical condition: is or is not.
- Select a Value from the drop-down menu. Based on the selected attribute name, there are different Value types you can select.
- Click Submit to save changes.
Modify a Condition
- Click the Edit icon next to the respective condition.
- Click Submit to save changes.
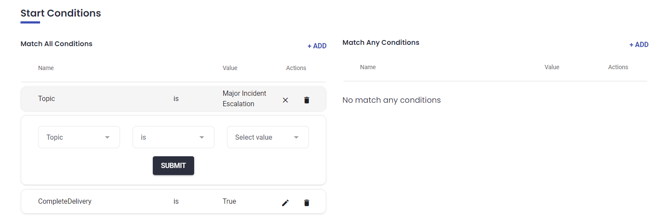
Condition Examples
Example 1:
In this example, we chose AlertStatus as the name. Thus, the Value can be Open, Closed, Cancelled, Assigned, or On Hold. This means the Workflow will start when the AlertStatus is [selected Value].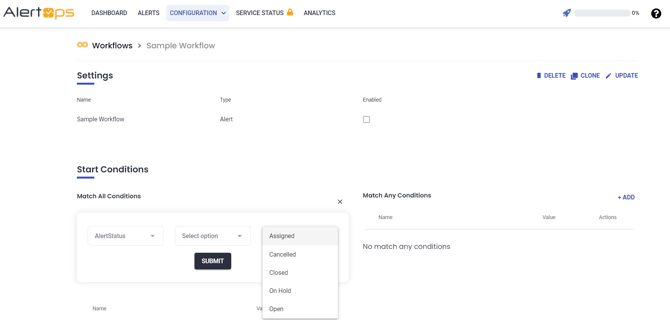
Example 2:
In this example, we chose MessageTopic as the name. Thus, the Value can be [TopicName]. This means the Workflow will start when the MessageTopic is [selected Value].
Example 3:
In this example, we chose Owner as the name. So, the Value can be [OwnerName]. This means the Workflow will start when the Owner is [selected Value].
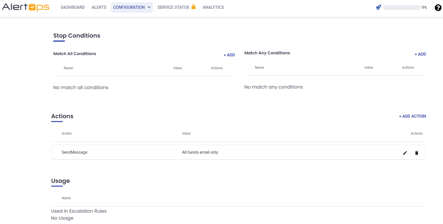
Part 3: Actions
Actions are enacted when the start conditions are met.
Add Action
- Click Add Action on the Workflows page.
- Choose an Action. Actions differ depending on the Alert Type. The most commonly used Action is SendMessage.
- Add details to the Action depending on the action type.
- Click Save

Action Example
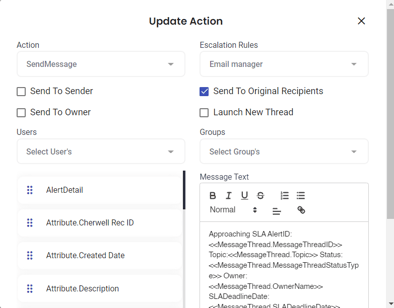
Example 1: SendMessage Action
- First, we select an Escalation Policy.
- Send to Sender sends message to the person who created the Alert (Manual Alerts only).
- Send to Owner sends Message to the assigned Alert Owner.
- Send to Original Recipients sends message to all Recipients currently on the Alert Thread. Note that Recipients are not needed if the Escalation Rule has Recipients defined or the Escalation Rule is sending to a System, such as an Outbound Service.
- Launch New Thread will create a new message thread.
- If necessary, you may select Users or Groups to add individually.
- Message Text is the text to be included in the Message. It can be a combination of static and dynamic text using any Alert field or Template field. Use Insert Keyword to insert dynamic alert fields into the Message Text. Message Text is not needed if the Escalation Policy is sending a system message using an Outbound Integration or if the Escalation Policy has static text.
- Click Save.
Scheduled Workflow Example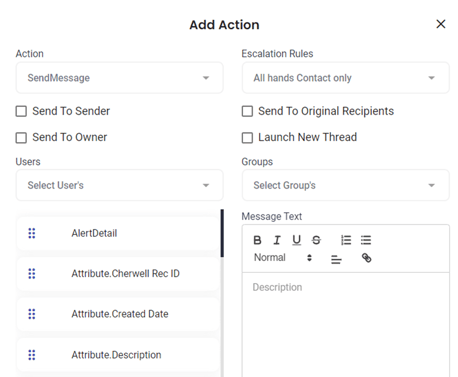
In this example, a Scheduled Workflow is set to recur at 60 minute intervals, until the Stop Condition are met.
Here, the Action is set up to send an email to the Alert Owner to remind them that the alert is still open.