
Permissions
The InboundIntegrations_GlobalAccess entitlement is necessary for creation, update, and deletion of inbound e-mail, API, and chat integration templates in the environment. The user roles that have access to this entitlement are Owner, App Admin, and Integrations Admin.
Overview
Relevant for App Admins and Integrations Admins
AlertOps comes with over 160 pre-built integration templates for common monitoring, ITSM, and help desk systems. The instructions below walk through getting up and running quickly with a pre-built Web API integration. For sources without a template, see Custom API Integration.
Configure a Pre-Built API Integration
Relevant for App Admin / Integrations Admin
Step 1 — Open Inbound Integrations and filter by API
- Click Configurations on the menu bar, then select Integrations.
- Scroll to the Inbound Integrations section.
- In the channel-type drop-down on the right (alongside the search box and the status filter), select API. The integrations table refreshes immediately. The drop-down's four values are API, Email, Chat, and Heartbeat — API is the default on landing.
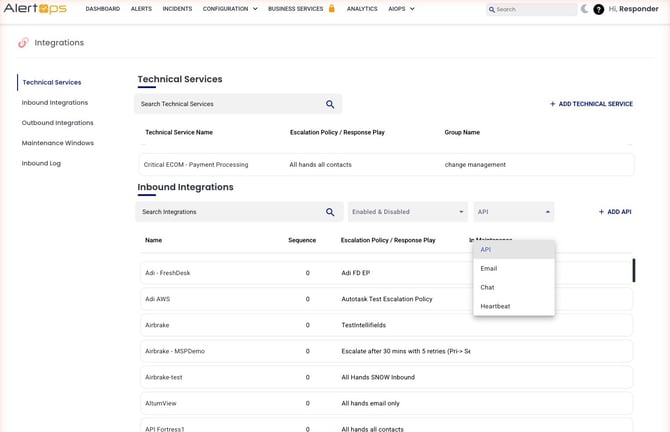
Figure 1. The Inbound Integrations section with the channel-type filter set to API. The drop-down exposes API, Email, Chat, and Heartbeat in that order.
Step 2 — Click + ADD API
In the top-right of the Inbound Integrations section header (to the right of the search box and filter drop-downs), click + ADD API.
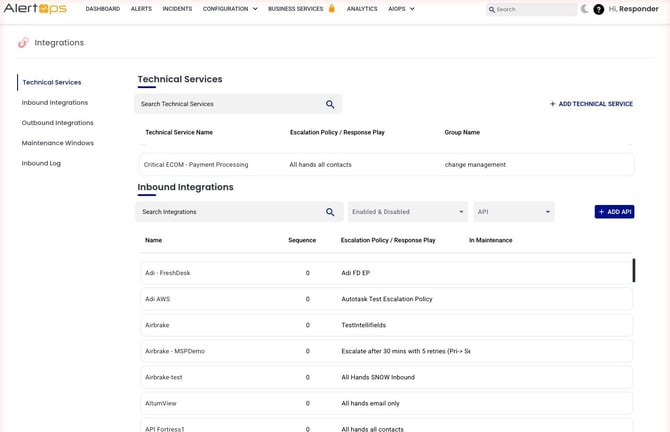
Figure 2. The + ADD API button (uppercase, with a leading + icon) sits at the top-right of the Inbound Integrations section header.
Step 3 — Pick a template from the gallery
On the API Integration screen, the available integration templates are presented as cards in a single alphabetical grid under a Recommended heading. There are around 160 prebuilt templates including Datadog, NewRelic, Splunk, Nagios, AlertSite, Alerta, Airbrake, API Fortress, and many more, plus a Custom card for sources without a template.
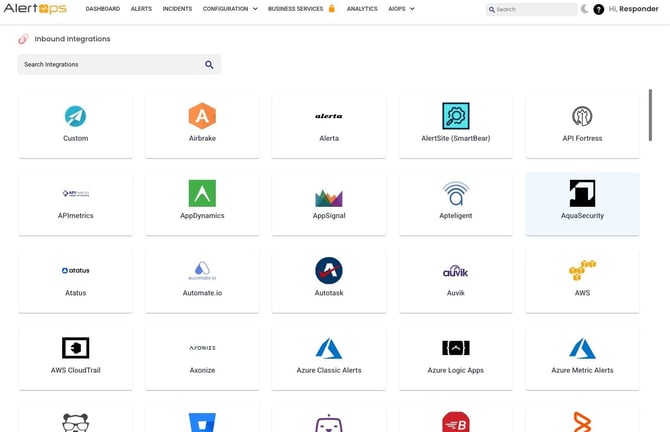
Figure 3. The template gallery. Custom is not grouped separately — it sits in the alphabetical grid alongside vendor templates.
Step 4 — Configure Basic Settings
Selecting a template opens the integration's Basic Settings form. Fill in the fields and click SUBMIT.
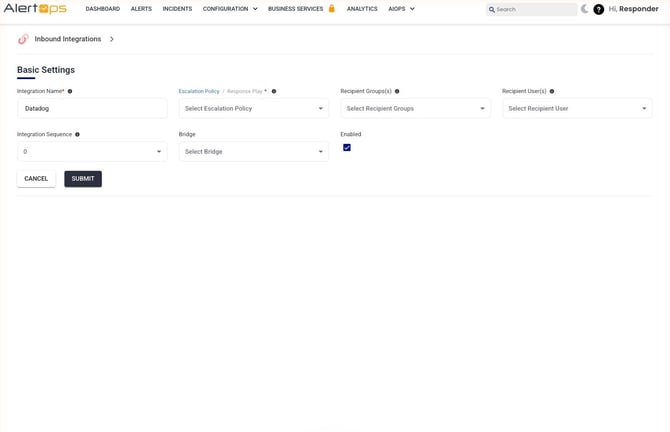
Figure 4. The Basic Settings form on a new Datadog integration. The Escalation Policy / Response Play header is a toggle between two single-select modes; Recipient Groups and Recipient Users are independent multi-select drop-downs.
Basic Settings field reference
|
Field |
Description |
|
Integration Name * |
Required. Pre-populated with the template's name (e.g., "Datadog"). Edit if you want a more specific name like "Datadog Production" or "Datadog Platform Prod". |
|
Escalation Policy / Response Play * |
Required. A single drop-down with a header that toggles between Escalation Policy mode and Response Play mode. Pick one mode and select a value. Single-select. |
|
Recipient Groups(s) |
Optional. Multi-select drop-down with checkboxes. Any groups selected here receive the alert in addition to the Escalation Policy. |
|
Recipient User(s) |
Optional. Multi-select drop-down. Specific users named here are also notified, in addition to the Escalation Policy and Recipient Groups. |
|
Integration Sequence |
Numeric drop-down, default 0. Controls integration ordering / priority — see Integration Sequence and Cloning. |
|
Bridge |
Optional drop-down. Conference bridge to attach to alerts from this integration. |
|
Enabled |
Toggle, on by default. Disable to keep the integration configured without it accepting incoming events. |
|
All three recipient fields are independent and additive Escalation Policy / Response Play, Recipient Groups, and Recipient Users are not alternatives. A saved integration can route to a policy AND additional groups AND ad-hoc users in parallel — every recipient configured fires per the integration's notification rules. Configure only what you need. Note: Escalation Policy / Response Play is single-select (one mode and one value at a time). Recipient Groups and Recipient Users are both multi-select. |
Step 5 — Copy the endpoint URL
Click SUBMIT (bottom-left of the form, dark navy filled, alongside CANCEL). The saved integration page opens with the endpoint URL displayed at the top. Click COPY to copy it to the clipboard — the button label changes to COPIED in place to confirm the action.
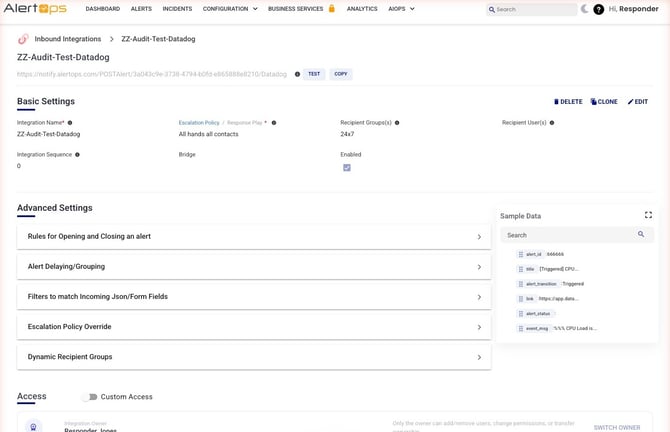
Figure 5. The saved integration page. The endpoint URL follows the pattern https://notify.alertops.com/POSTAlert/<token>/<integration-name>. The token is in the URL path — there are no query parameters.
Step 6 — Wire up the source tool
- Paste the copied endpoint URL into the source tool's webhook configuration.
- Trigger a test event from the source tool.
- Verify the alert appears in AlertOps under Alerts. The Source field on the alert reflects the integration template (e.g., "Datadog") and field mappings parse the payload into Subject, Source ID, Source URL, and the configured Escalation Policy fires notifications.