
Permissions
The InboundIntegrations_GlobalAccess entitlement is necessary for creation, update, and deletion of inbound e-mail, API, and chat integration templates in the environment. The user roles that have access to this entitlement are Owner, App Admin, and Integrations Admin.
Overview
Relevant for App Admins and Integrations Admins
AlertOps can integrate with any system that supports REST API output. When the source system isn't in the prebuilt template list (160+ vendors), the Custom template lets you define the integration end-to-end — Source, identifiers, field mapping, and the rules that decide when each kind of alert event fires.
Configure a Custom API Integration
Relevant for App Admin / Integrations Admin
Step 1 — Open the template gallery and pick Custom
- Click Configurations on the menu bar, then select Integrations.
- From the Inbound Integrations section, select API from the drop-down menu on the right.
- Click + ADD API in the top right.
- In the alphabetical template gallery, click the Custom card. The card is the first card in the grid (alphabetical) and looks the same as the vendor cards.
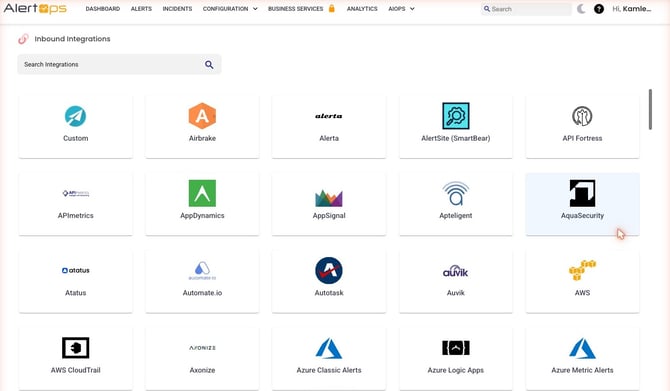
Figure 1. The Custom card in the template gallery. The card label reads "Custom" (not "Custom Integration") and is not visually differentiated from vendor cards.
Step 2 — Configure Basic Settings
Selecting Custom opens the same Basic Settings form as the prebuilt templates. The Integration Name field is pre-populated with "Custom" — overwrite it with something descriptive (the published article uses "ABC Monitoring" as a worked example).
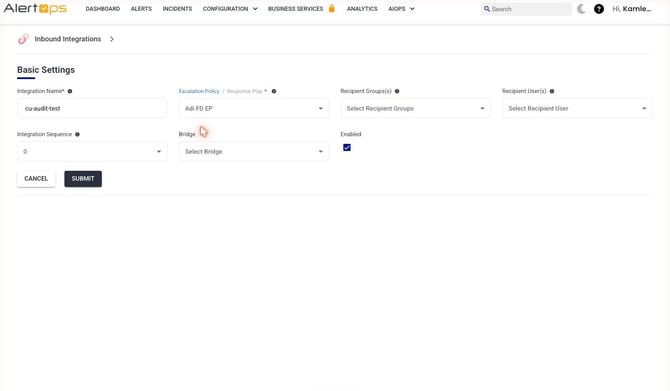
Figure 2. The Basic Settings form on a new Custom integration. The form is identical to the prebuilt template form — only the pre-populated Name ("Custom") differs.
Pick an Escalation Policy (or toggle the header to Response Play mode) and optionally Recipient Groups / Recipient Users. Click SUBMIT.
Step 3 — The saved integration page
After Submit, the integration's saved page opens. The endpoint URL is at the top with TEST and COPY buttons inline, and an Authorization Header toggle below it. The header on the right shows DELETE, CLONE, and EDIT actions.
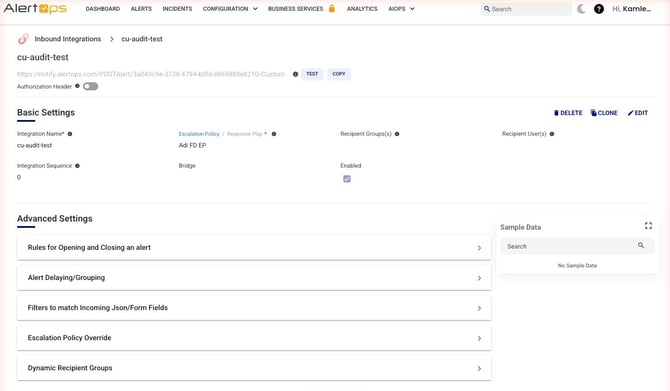
Figure 3. The saved integration page. Notice the endpoint URL ends in /Custom — the trailing path segment matches the Source value (which defaults to "Custom"), not the Integration Name. Authorization Header is a toggle that lives below the URL.
|
Endpoint URL pattern The URL follows the pattern https://notify.alertops.com/POSTAlert/<uuid-token>/<source-value>. The trailing segment is the Source field's value (not the Integration Name). On a fresh Custom integration the default Source is "Custom" — change it under Advanced Settings → Rules to brand the URL with your source system's name. If you change the Source later, the URL updates live as you type and the saved URL must be re-distributed to the source tool. The old URL stops working as soon as the Rules drawer is saved. |
Rules for Opening and Closing an alert
Relevant for App Admins configuring custom mappings
The Advanced Settings section at the bottom of the integration page lists five collapsible drawers — Rules for Opening and Closing an alert, Alert Delaying/Grouping, Filters to match Incoming Json/Form Fields, Escalation Policy Override, and Dynamic Recipient Groups. Expand the first one to configure the field mappings that produce alerts.
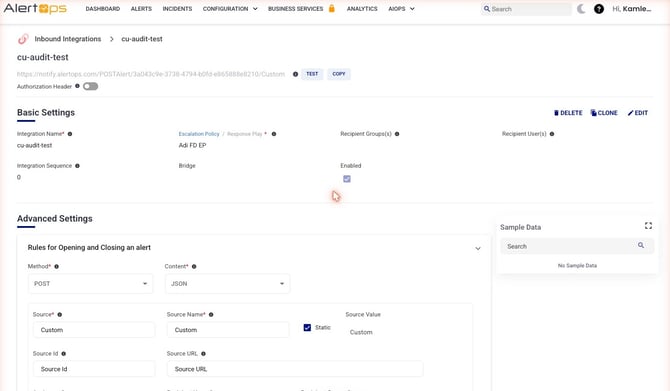
Figure 4. The Rules drawer expanded. Required fields are starred (Method, Content, Source, Source Name). The Source Value / Static toggle pins the Source value as a literal — uncheck Static to map it dynamically from incoming payload.
Rules drawer field reference
|
Field |
Description |
|
Method * |
HTTP method the integration expects on inbound calls. Drop-down. Defaults to POST. |
|
Content * |
Payload content type. Drop-down. Defaults to JSON. |
|
Source * |
The type or category of the integration. Determines the trailing segment of the endpoint URL. Defaults to "Custom" — change it to brand the URL (e.g., "ABC Monitoring" yields .../POSTAlert/<uuid>/ABC Monitoring). |
|
Source Name * |
A more descriptive name to differentiate instances of the same source (e.g., "Nagios Production" vs "Nagios Development"). Defaults to mirror Source. |
|
Source Value / Static (toggle + value) |
Static checked means Source Name is a literal value; uncheck to map Source Name dynamically from the incoming payload. The value field renders the resolved value below. |
|
Source Id |
Unique identifier for the alert within the source. Free text or dynamic — drag a JSON key from the Sample Data panel (right rail) to map dynamically. |
|
Source URL |
URL associated with the alert (a runbook link, dashboard link, or the source system's detail page). Free text or dynamic. Not documented in the published article — added recently. |
|
Status Control drawers (sub-drawers) |
Below the field block, three collapsible sub-drawers — Open Alert When, Close Alert When, Update Alert When — let you define the conditions that trigger each kind of alert event. These are stacked panels, not radios or buttons. |
For the deeper how-to on configuring these rules — conditionals, transforms, and dynamic-key dragging — see Advanced Field Mapping.
Sample Data and Dynamic Keys
Relevant for App Admins testing or evolving a custom mapping
The Rules drawer includes a Sample Data text area for pasting a representative JSON payload. After you paste a sample and click the green confirm (✓) button, the JSON's keys are extracted and listed in the Sample Data panel on the right rail (with a Search box at the top). Each row shows the key and its parsed value side-by-side, e.g. severity :CRITICAL.
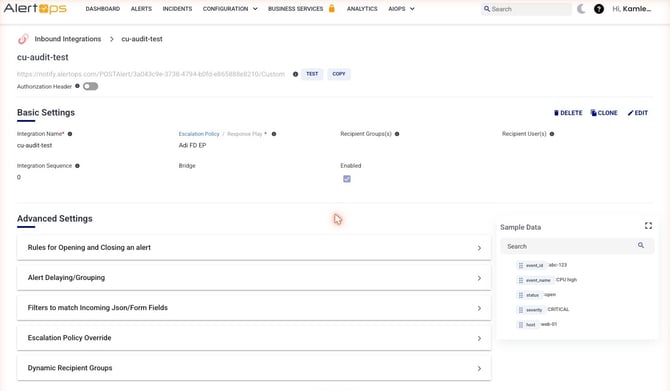
Figure 5. The Sample Data panel after a JSON payload is confirmed. The five top-level keys (event_id, event_name, status, severity, host) appear in the right rail with their parsed values.
Each row in the panel has a drag handle (≡). Drag a key onto any Rules-drawer field that accepts dynamic values to map it. The dragged reference renders as a double-curly-brace placeholder in the target field — e.g., dragging severity inserts .
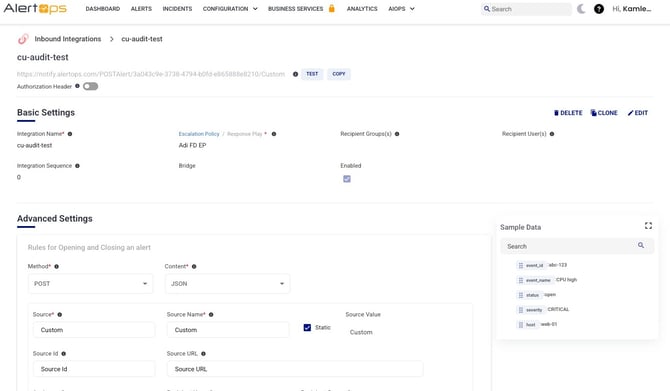
Figure 6. Dragging severity from the Sample Data panel into a Rules field inserts the literal placeholder. AlertOps resolves the placeholder against each incoming payload at run time.
|
Drag-and-drop is the only mapping interaction The Sample Data panel uses the Angular CDK drag-list — synthetic mouse-down / mouse-up sequences won't fire the binding. Use a real drag (HTML5 dragstart / dragover / drop events). There is no click-to-insert affordance. |
Testing the Integration
Relevant for Anyone validating a custom configuration
Two actions live alongside the endpoint URL at the top of the integration page:
- COPY — copies the endpoint URL to the clipboard. The button copies silently with no in-place label change on the Custom path.
- TEST — runs a quick connectivity check. The button does not create an alert in the Alerts list. After the click, the inline text "Success Click here" appears next to COPY, where "Click here" links to the Inbound Log view for that integration so you can inspect the recent inbound messages.
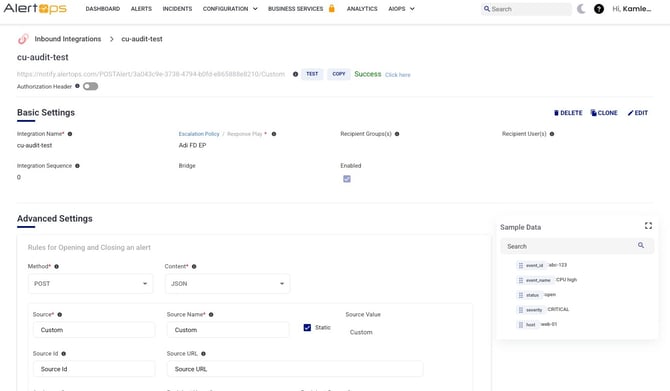
Figure 7. After clicking TEST, the integration shows "Success" inline with a "Click here" link to the Inbound Log. TEST is a connectivity check — it does not create a real alert.
For end-to-end testing of an alert payload, send a POST to the endpoint URL from a separate tool (Postman, curl, the source system itself) and verify the alert lands in Alerts with the expected field mapping.
Changing the Source / Regenerating the URL
Relevant for Anyone renaming or rebranding a custom integration
Editing the Source field in the Rules drawer rebrands the URL — both the URL at the top of the integration page and any external webhook configuration that pointed at the old URL. The behavior:
- The API URL updates live as you type into Source — you can see it change in the row at the top of the page.
- A Generate link sits at the right edge of the API URL textbox. It is mostly redundant — the URL is already updating live. Clicking Generate doesn't visibly add new behavior once Source has been edited.
- Save the Rules drawer (click the green ✓) to persist the change. A "Rules Updated Successfully" toast confirms the save. The old URL stops accepting requests at this point.
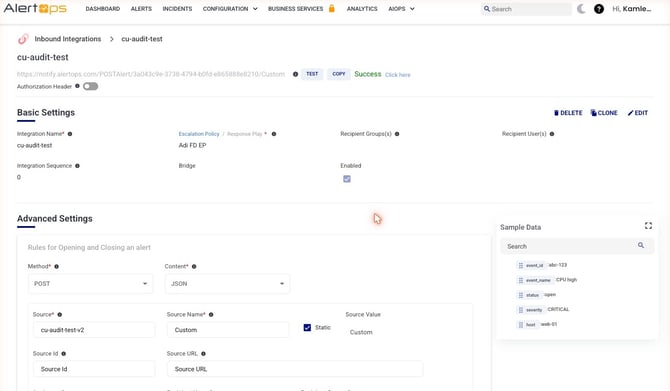
Figure 8. After changing the Source value to cu-audit-test-v2, the URL updates live. The Generate link at the right edge of the URL textbox is largely redundant on Custom integrations — the URL is already current.
|
Coordinate the URL change with the source tool Saving the Rules drawer invalidates the previous URL immediately. Make sure the source system's webhook configuration is updated to the new URL before you save, or you will drop incoming events between the save and the source's update. |