
Purpose
A Group is the central unit in AlertOps for answering two operational questions consistently: who should be notified, and when. Groups typically represent a team (for example, "SRE On-Call"), but can also represent a function, a region, a tier (L1 / L2), or a blended rotation.
Audience
Relevant for Account Owners and App Admins
Creating, editing, and deleting groups is an admin action. Group members can view their group details from the Profile page, but cannot make administrative changes.
Prerequisites
- Account Owner or App Admin platform role.
- Familiarity with Basic Concepts (alerts, users, groups, schedules, escalation policies).
- If you plan to use Topics on a group, create the Topic first in Configuration → Administration so it appears in the Topic picker.
Why Groups Exist
Integrations, escalation policies, and schedules all attach to groups — not to individual users. A group gives you a stable handle to the people responsible for a class of alerts. When the roster changes (someone joins, leaves, rotates out), you update the group once and every attached integration, policy, and schedule continues to work.
|
A rule of thumb Keep groups stable — treat their structure and naming as long-lived. Use schedules (not membership changes) as the mechanism that shifts responsibility over time. |
The Six Things a Group Contains
Every group's detail page has six tabs, each mapping to one of the group's building blocks:
|
Tab |
What it controls |
|
Members |
Users who belong to this group, plus their Primary / Secondary / Manager assignment. You can also nest another group as a "member" for multi-team escalation. |
|
Schedule |
The on-call calendar. Each group begins with a single 24x7 shift by default; add shifts to rotate coverage. The view offers Day / Week / Month and a Timeline / Calendar toggle, plus WebCal Feed URL, iCal Export, and Email Schedule controls. The Schedule tab is greyed out until the group has at least one member. |
|
Contact Methods |
Shared / team contact endpoints — Group Email, Group SMS, Group Pager, Primary Email, Secondary Email, Primary Phone, and Secondary Phone — used when an escalation policy is directed at the group level rather than at a named user. |
|
Topics |
Tags attached to the group that let integrations and manual alerts route to a specific topic within the group — useful for pre-templated messages. |
|
Access |
Who is allowed to view or edit this group outside of App Admins. |
|
Governance |
Approval and audit settings for changes to the group. |
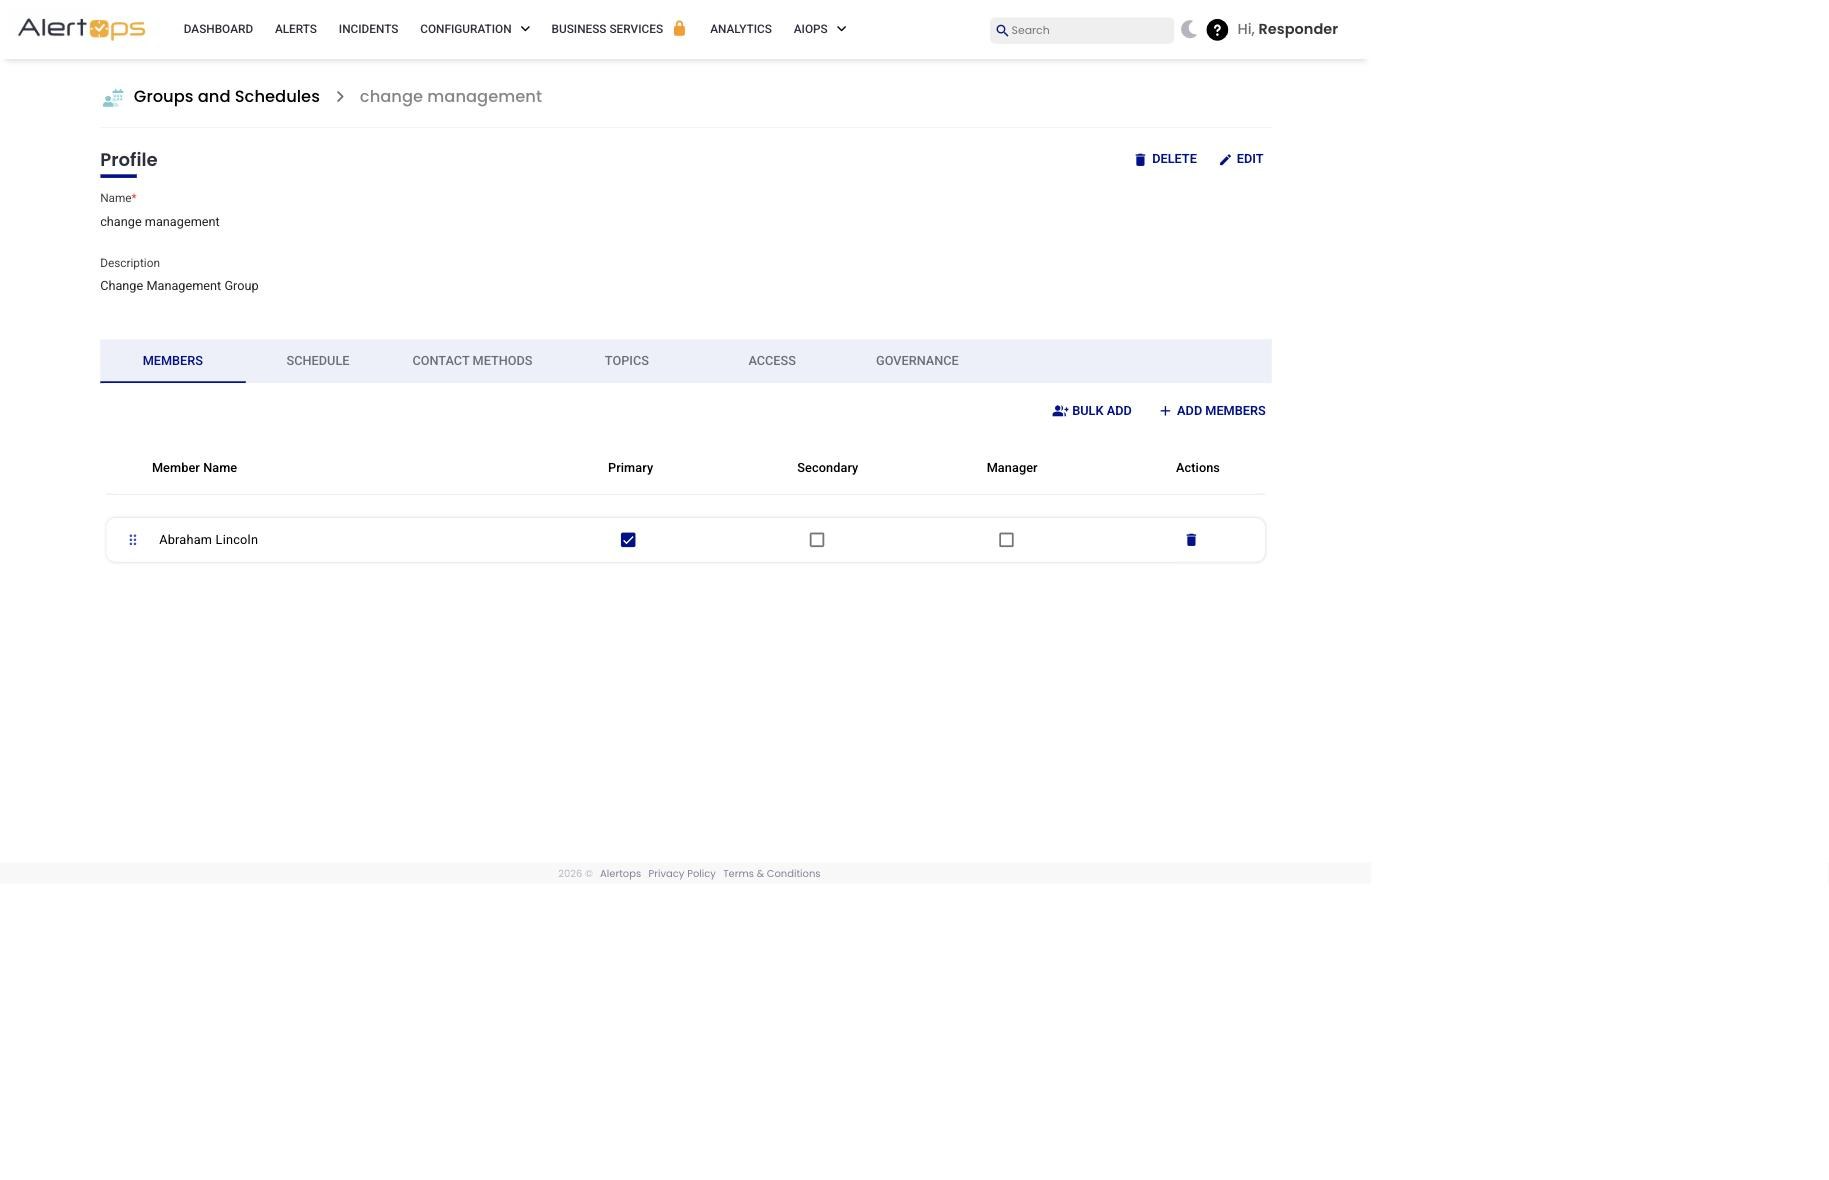
Figure 1. The group detail page — breadcrumb at top, Profile section with Edit and Delete buttons, and the six tabs below. Members tab shown.
Members — Users and Nested Groups
The Members tab lists every user (and any nested group) that belongs to this group. For each user, three checkboxes in the same row control their role inside this group: Primary, Secondary, and Manager. A user can hold more than one role (for example, Primary for one rotation and Manager for an entire group).
When you add a new user to the group via the Add Members dialog, they land on the Members tab with Primary automatically checked — change the role if Primary is not what you want before saving.
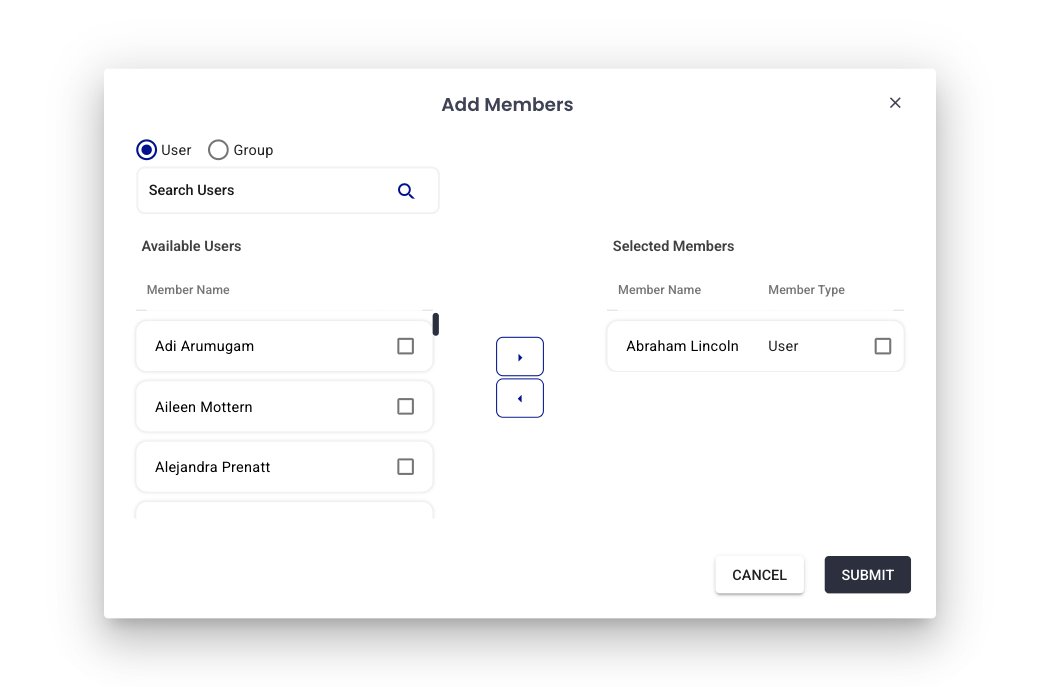
Figure 2. Add Members dialog — choose User or Group at the top, tick items on the left, click → to move them to Selected, then Submit.
Member types — Standard vs Stakeholder
- Standard users can take response actions on alerts (acknowledge, assign, escalate, reply).
- Stakeholder users receive notifications but cannot take response actions. Use Stakeholders for executives, customer-success leads, or anyone who needs awareness without the ability to change alert state.
Member roles — Primary, Secondary, Manager
- Primary — first tier in the escalation sequence. First person paged.
- Secondary — second tier. Paged if the Primary does not acknowledge in time.
- Manager — used as the final escalation tier when both Primary and Secondary fail to respond. A user assigned the Manager role can also edit the group (members, schedules, out-of-office). A user can hold Manager in addition to Primary or Secondary.
|
Primary and Secondary toggles may disappear after adding shifts When a new group is first created, Primary and Secondary are assigned directly from the Members tab — the group has a lone 24x7 shift by default. Once you add another shift on the Schedule tab and that shift configures its own Primary / Secondary / Rotating assignments, the Members-tab toggle columns for Primary and Secondary are removed. The shift is now the source of truth for those roles; the Manager role column remains because Manager is group-level, not shift-level. |
Nested groups
You can add a whole group to another group as a "member." In the Add Members dialog, switch the User / Group radio toggle at the top to "Group" — the picker replaces Available Users with Available Groups, listing every group in the tenant. Use this to model multi-team escalation (for example, an L1 group containing the L2 group as a fallback) without duplicating individual user memberships.
Schedule — When the Group Is On-Call
The Schedule tab defines when each member is the expected responder. Every group begins with a single 24x7 shift by default so that initial escalations have someone to reach; as you add real rotations, the on-call assignments shift into per-shift configurations.
- Add fixed shifts (same user covers the same window) or rotating shifts (coverage rotates across a team).
- Each shift has its own Time Zone (see Time Zones) and its own Primary / Secondary / Rotating configuration.
- Shifts can have overrides — short-term replacements (vacation coverage, swaps).
- Switch the calendar between Day / Week / Month views, and switch between Timeline and Calendar layouts.
- Export or share the schedule from the same tab — WebCal Feed URL, iCal Export, and Email Schedule controls are at the top of the tab.
- The Schedule tab is greyed out until the group has at least one member.
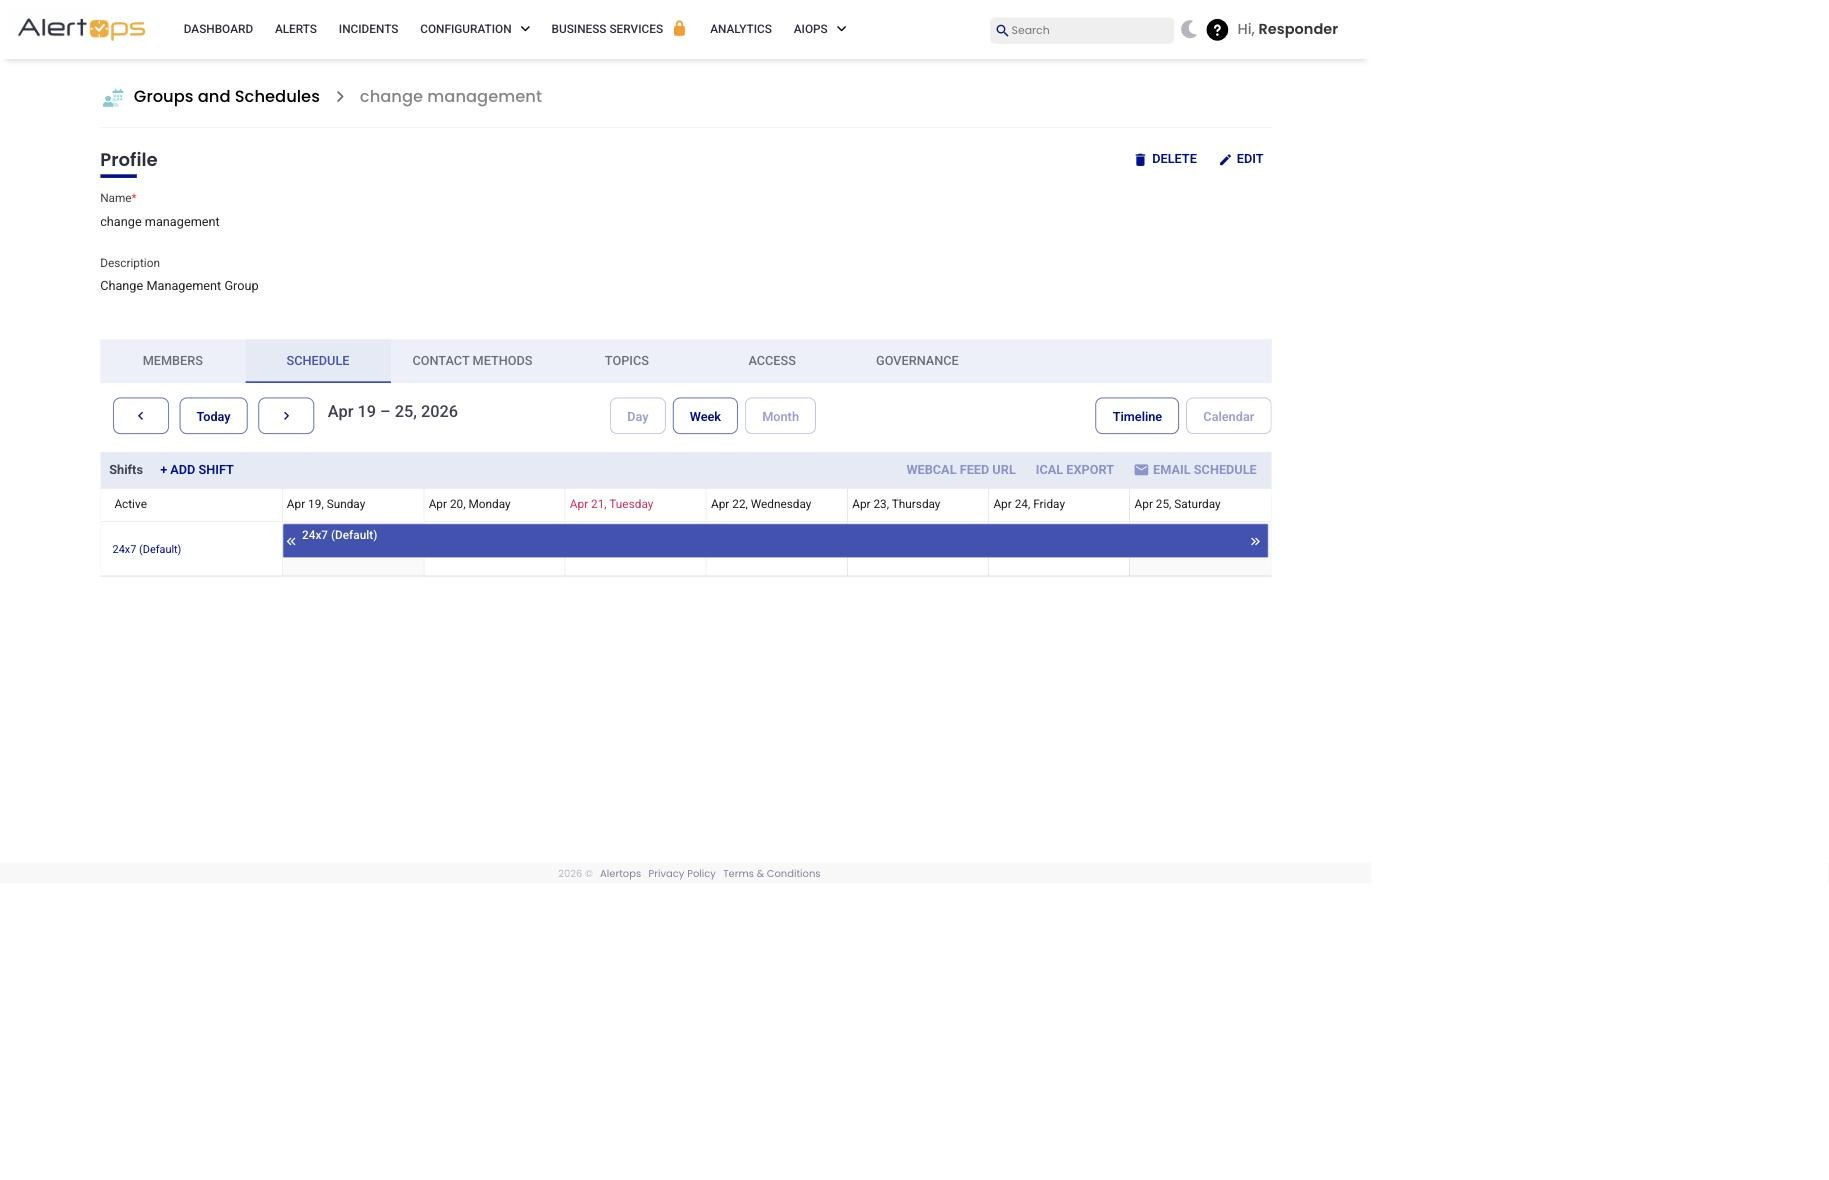
Figure 3. Schedule tab — Day / Week / Month toggle, Timeline / Calendar toggle, and export controls (WebCal Feed URL, iCal Export, Email Schedule). The 24x7 shift is the default that ships with every new group.
Contact Methods — Shared Group Endpoints
The Contact Methods tab stores shared contact endpoints that belong to the group itself, separate from each user's personal contact methods. An escalation policy can point to these group-level methods when it needs to reach the group rather than a named user. Seven contact method types are available:
- Group Email
- Group SMS
- Group Pager
- Primary Email
- Secondary Email
- Primary Phone
- Secondary Phone
Use these for team aliases (for example, a shared mailing list or SMS gateway), pager rotations, or on-call numbers that forward to whoever is currently on duty.
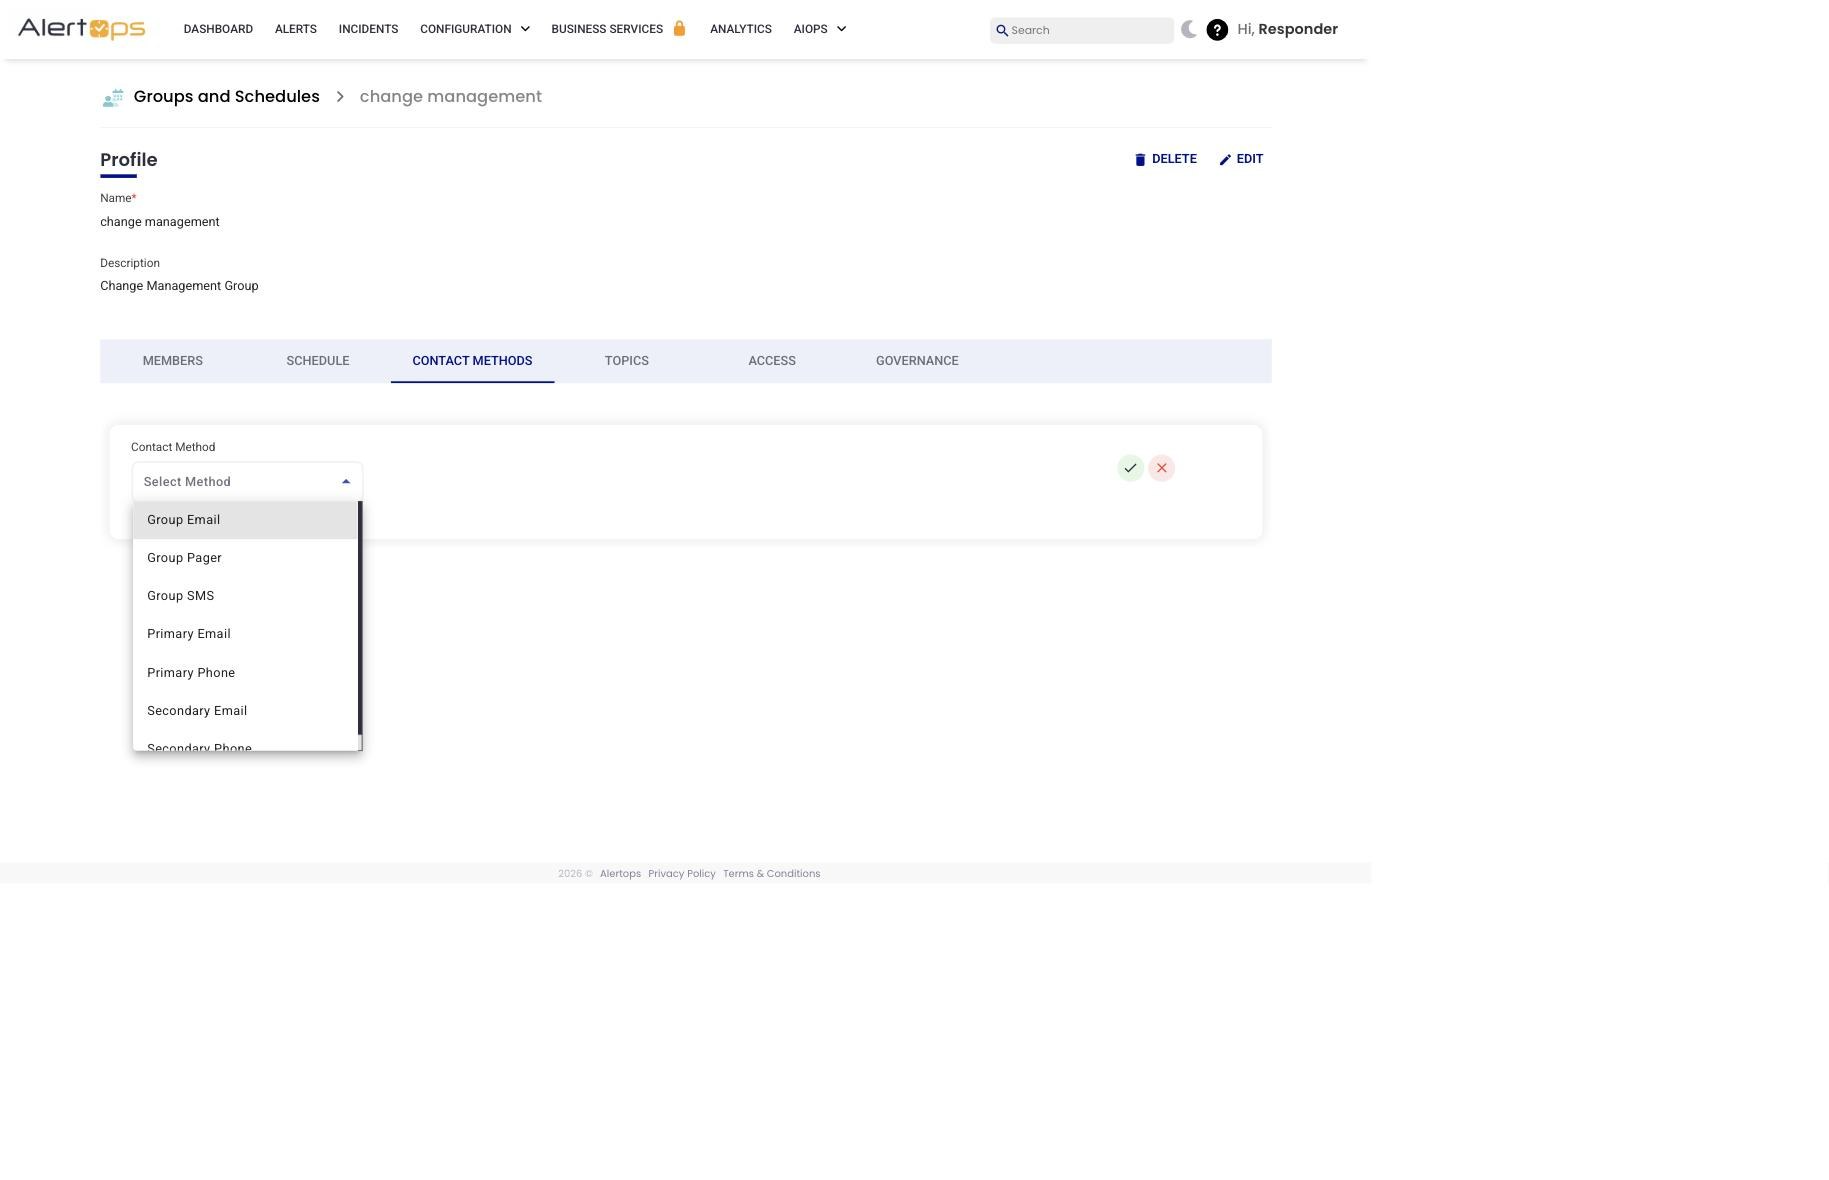
Figure 4. Contact Methods tab with the Select Contact Method dropdown open — all seven group-level types are available.
Topics — Fast Manual Routing
Topics are tags associated with a group that allow integrations and manual alerts to pre-select a subset of the group plus a pre-written message. Good for common incident scenarios where responders benefit from a templated summary.
|
Topic prerequisites A Topic must already exist (created in Configuration → Administration) before you can attach it to a group. |
Access and Governance
The Access tab controls who can view or edit this group outside of App Admins. The Governance tab holds approval and audit settings for group changes. Both are optional — most groups never need custom access or governance rules.
Create a Group
Relevant for Admins
- Go to Configuration → Groups and Schedules.
- Click + Add Group in the top-right.
- Enter a clear Group Name that describes the responsibility (for example, "Payments On-Call", "Database Tier 1").
- Optional: attach a Topic if you have one already configured.
- Optional: enable Dynamic to auto-populate members based on user attributes. For most teams, leave this off and add members manually.
- Click Submit. The group is created and opened at its detail page.
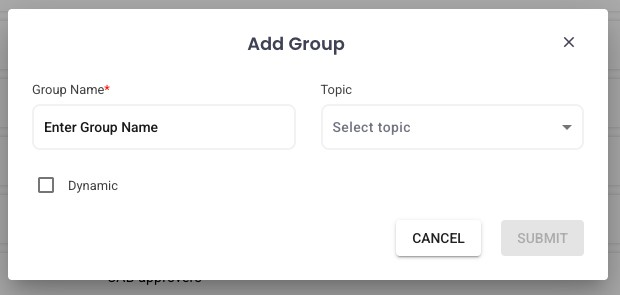
Figure 5. Add Group modal — Group Name is the only required field.
Edit a Group
Relevant for App Admins and Group Managers
- From Configuration → Groups and Schedules, click the group you want to edit.
- Click the Edit button in the top-right of the Profile section (next to Delete).
- Update the Group Name, Description, Topic, or Dynamic setting.
- Click the green check-mark (✓) to save.
To modify members, schedules, contact methods, topics, access, or governance, use the corresponding tab on the group detail page — not the Profile section Edit button.
Delete a Group
Relevant for App Admins
- Open the group's detail page.
- Click Delete at the top-right of the Profile section.
- Confirm the deletion in the prompt.
|
Before deleting Deleting a group also removes its schedule, its contact methods, and any associations with integrations or escalation policies. Confirm that no live integrations are routing to the group before deletion — those integrations will need a new target. |
How Groups Behave at Runtime
When an alert arrives at a group, AlertOps does three things in order:
- Choose eligible responders based on group membership and role (Primary / Secondary / Manager).
- Choose on-duty responders based on the schedule — whoever is assigned to the current shift wins over static role assignments.
- Apply escalation intent — page the Primary first, Secondary if the Primary does not acknowledge, Manager as the final fallback, with wait times and retries controlled by the group's escalation policy.
Best Practices
Do
- Keep groups stable and use schedules to represent rotations that change over time.
- Adopt a clean tier design — Primary for the first responder, Secondary for backup, Manager for final escalation — and document the intent in the group description.
- Use nested groups for layered support (L1 → L2) when it simplifies escalation.
- Pre-configure Topics for common incident scenarios used in manual alerting.
- Before attaching a Topic, make sure it already exists under Configuration → Administration.
Don't
- Overload one group with unrelated teams. Escalation becomes impossible to reason about.
- Change a group's name frequently — downstream integrations and reports reference it by name.
- Delete a group with live integrations pointing at it. Re-target the integrations first.