
Overview
Relevant for Anyone covering or being covered for an absence
In the Override section we covered short-term schedule changes that affect the whole group. This article is the individual-user equivalent: an Out-of-Office profile that redirects all of one user's notifications to a covering person for the duration specified.
This is useful for vacations, sick days, or maternity leave — anything where one person needs coverage without a full group-schedule edit.
Out of Office Set Up
Relevant for Admin setting OOF for any user, or the user themselves
- Click Configurations from the menu and select Users.
- Select the user you want to set up OOF for.
- From the user page, scroll down to the Out of Office section.
- Click the + ADD OOF button on the right side of the screen.
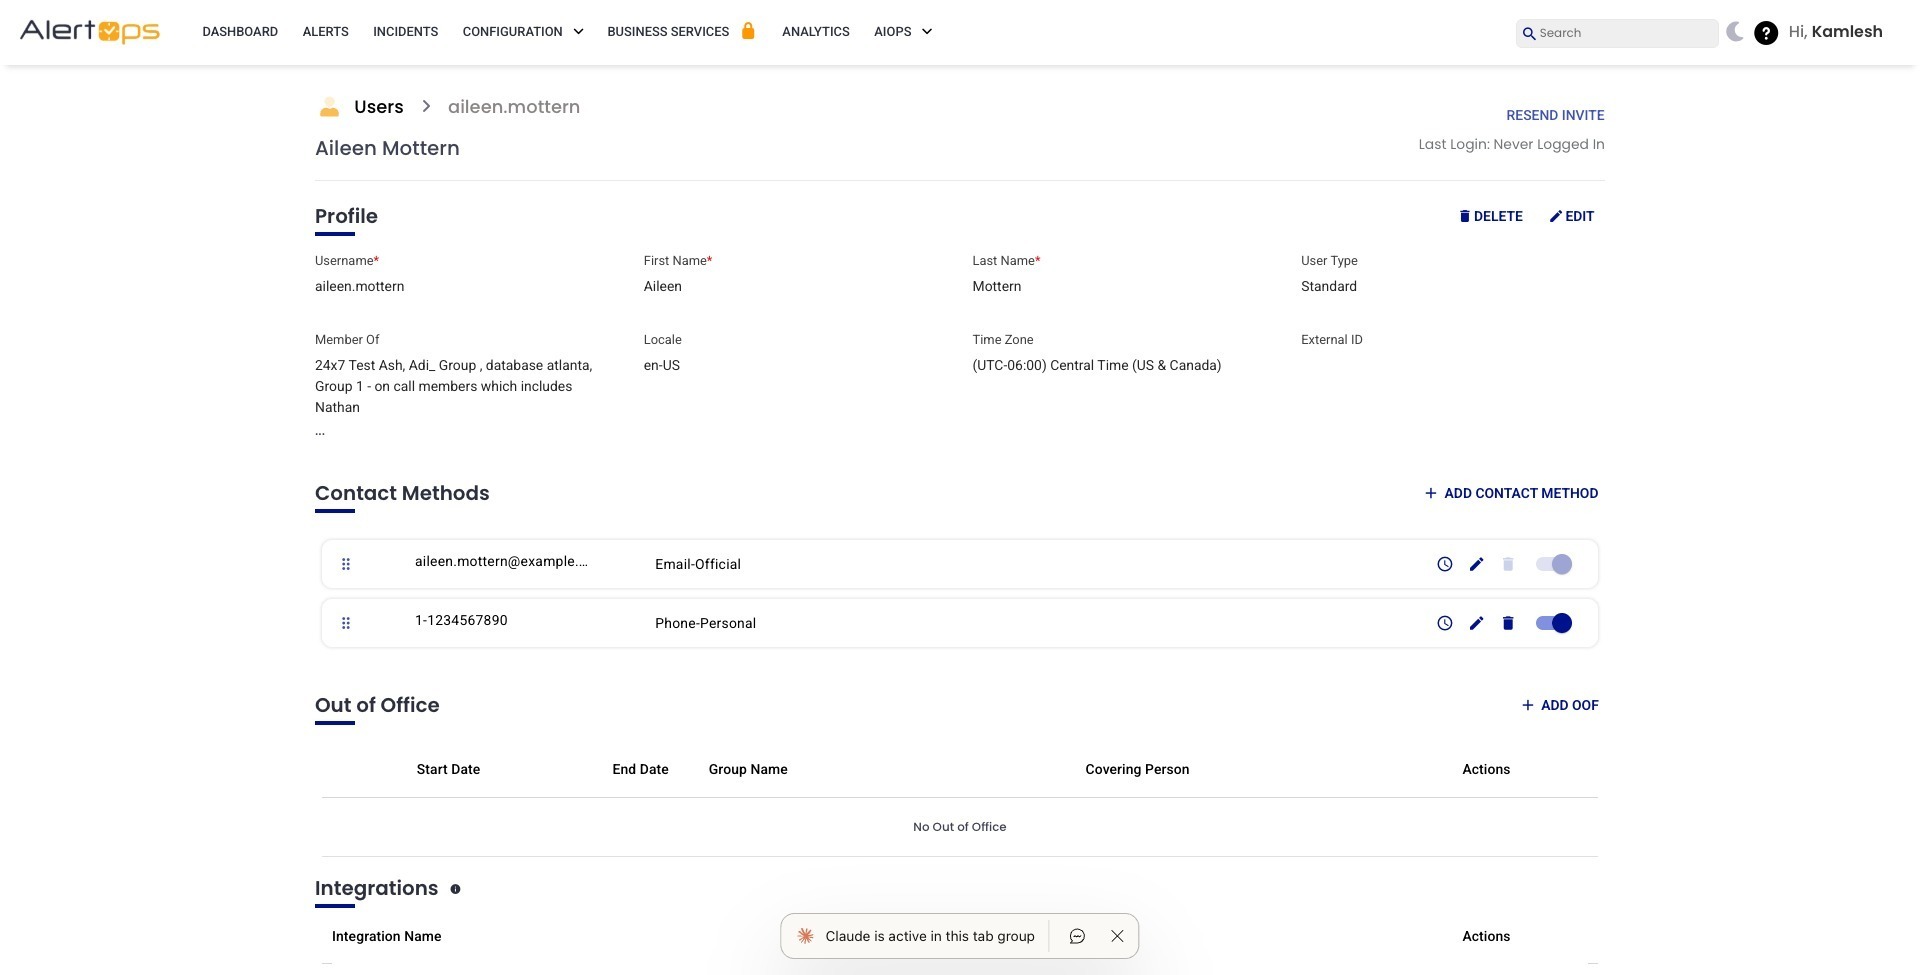
Figure 1. The Out of Office section on a user profile, empty. The + ADD OOF button is on the right; the table headers — Start Date, End Date, Group Name, Covering Person, Actions — preview what a saved entry will look like.
- An Out of Office dialogue box appears. Enter a Start Date and End Date, and a Start Hour and minute / End Hour and minute. You can configure full-day or partial-day windows — for a full day, set the start time to 00:00 and the end time to 23:59.
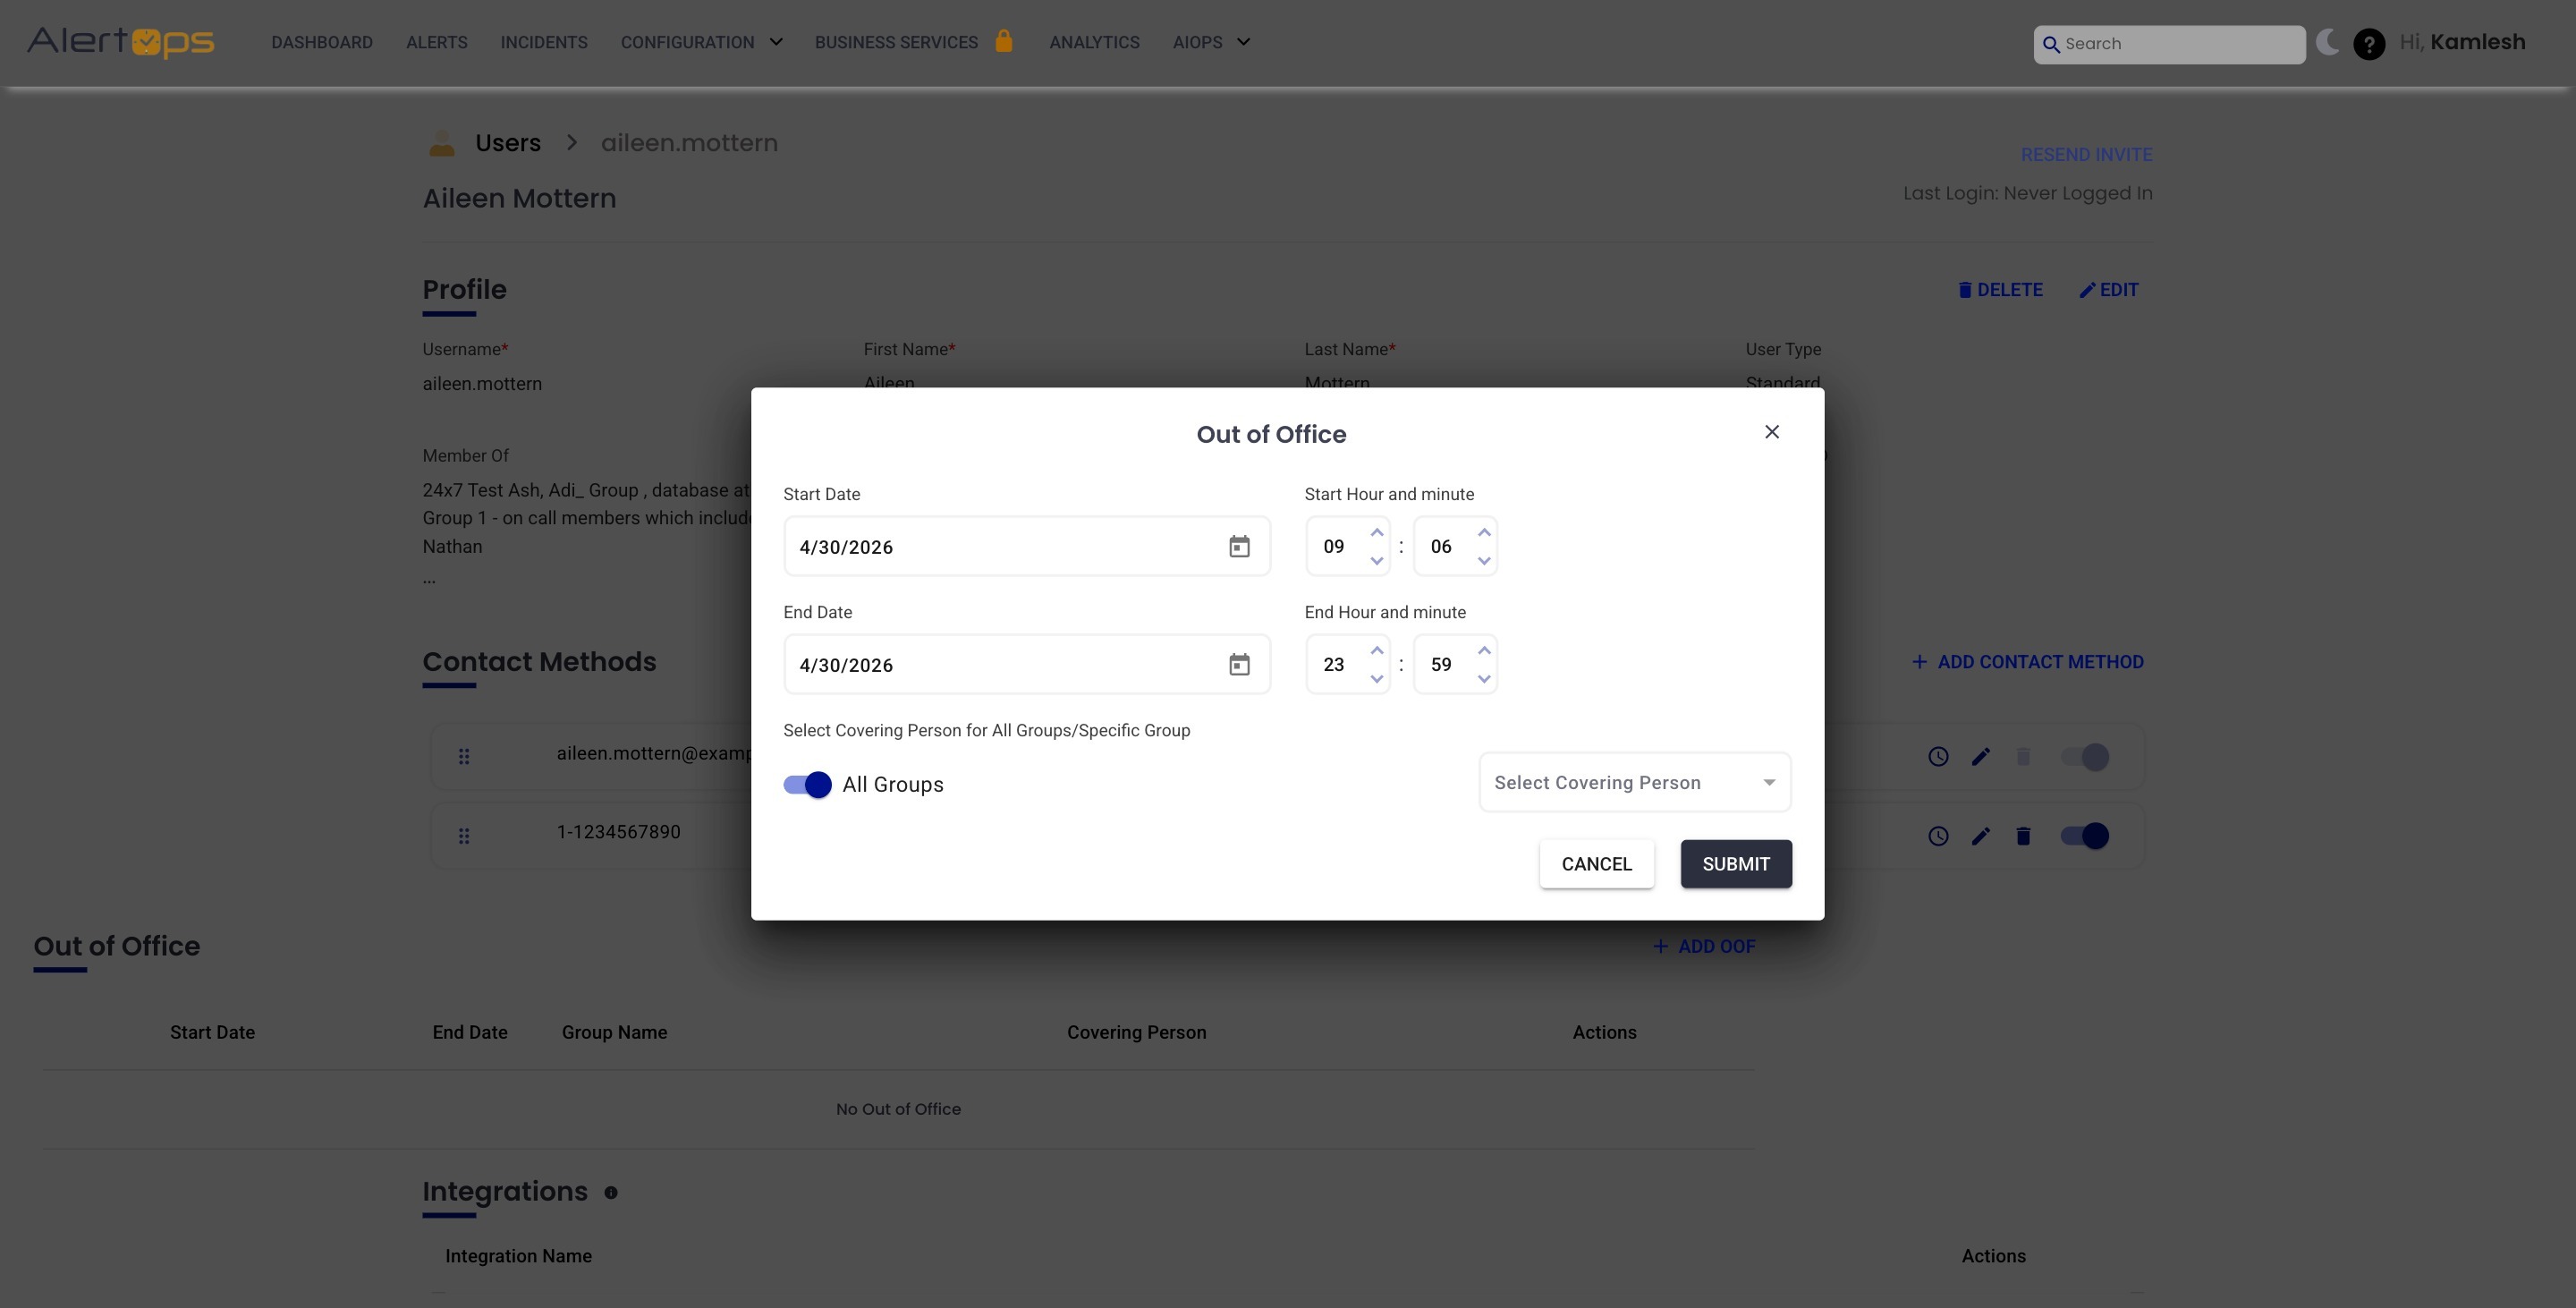
Figure 2. The Out of Office dialog opens with All Groups toggled ON by default. A single Select Covering Person dropdown applies the chosen back-up to every group the user belongs to.
- Choose a Covering Person. Above the All Groups toggle the dialog displays "Select Covering Person for All Groups/Specific Group." With All Groups ON, pick one person from the Select Covering Person dropdown — they cover every group the user belongs to. Toggle All Groups OFF to designate a different covering person for each group the user is involved in.
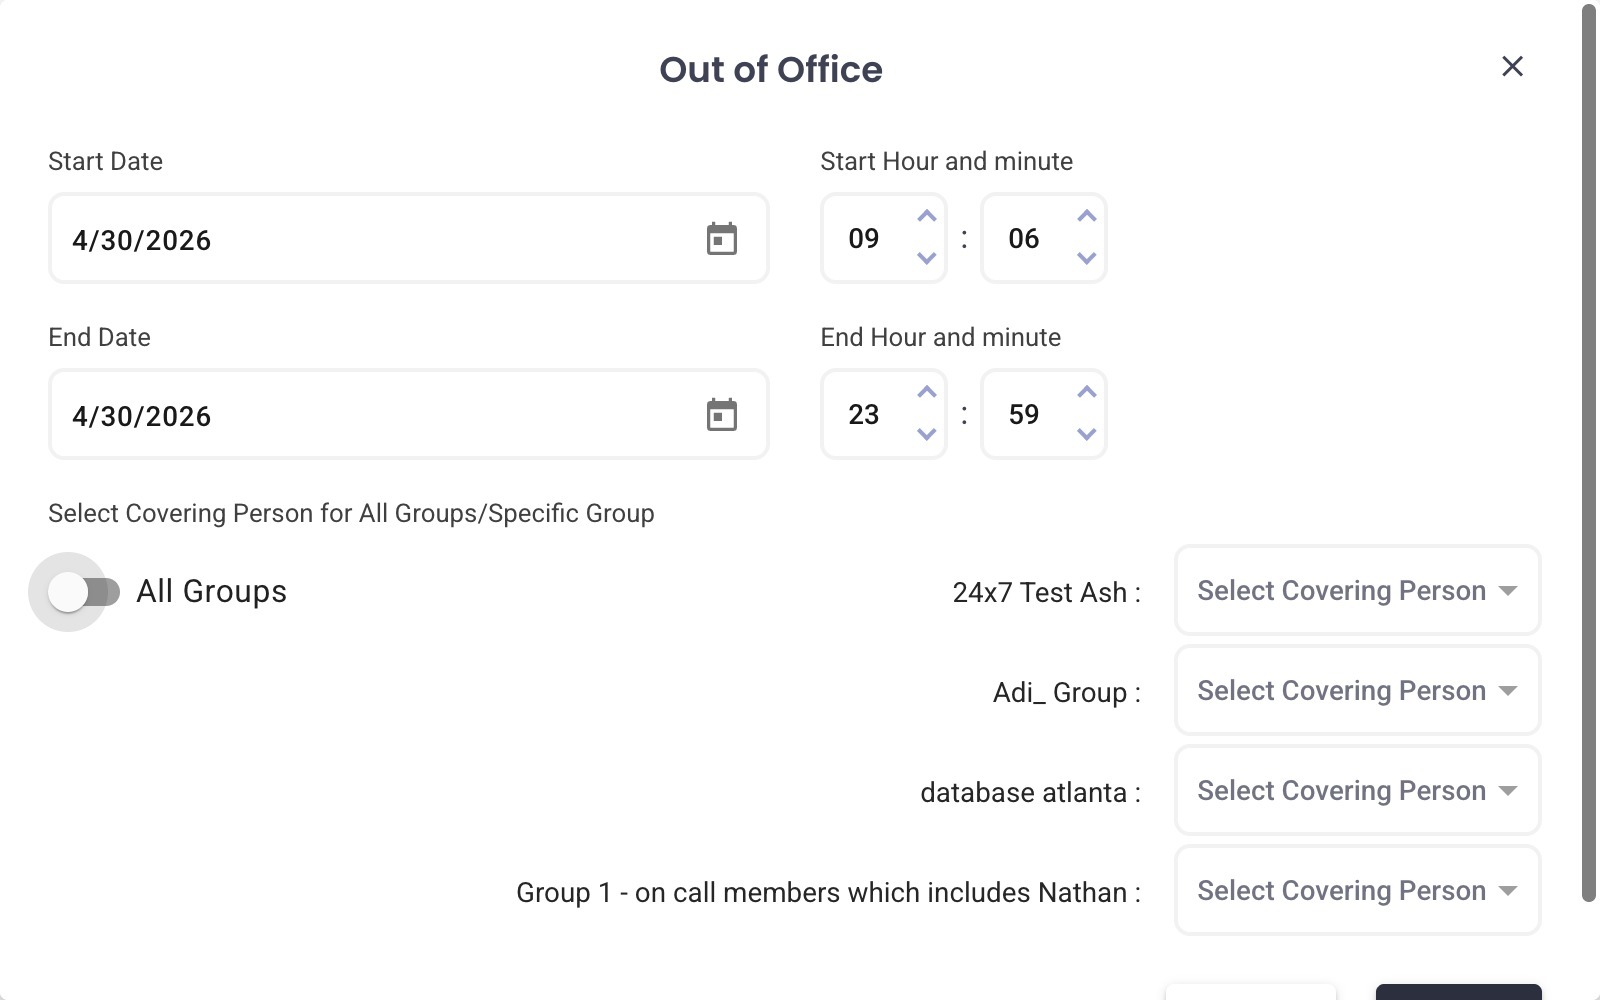
Figure 3. With All Groups toggled OFF, the dialog renders one row per group the user belongs to, each with its own Select Covering Person dropdown.
- Click SUBMIT once you are finished entering the details. The new entry appears in the Out of Office section of the user's profile.
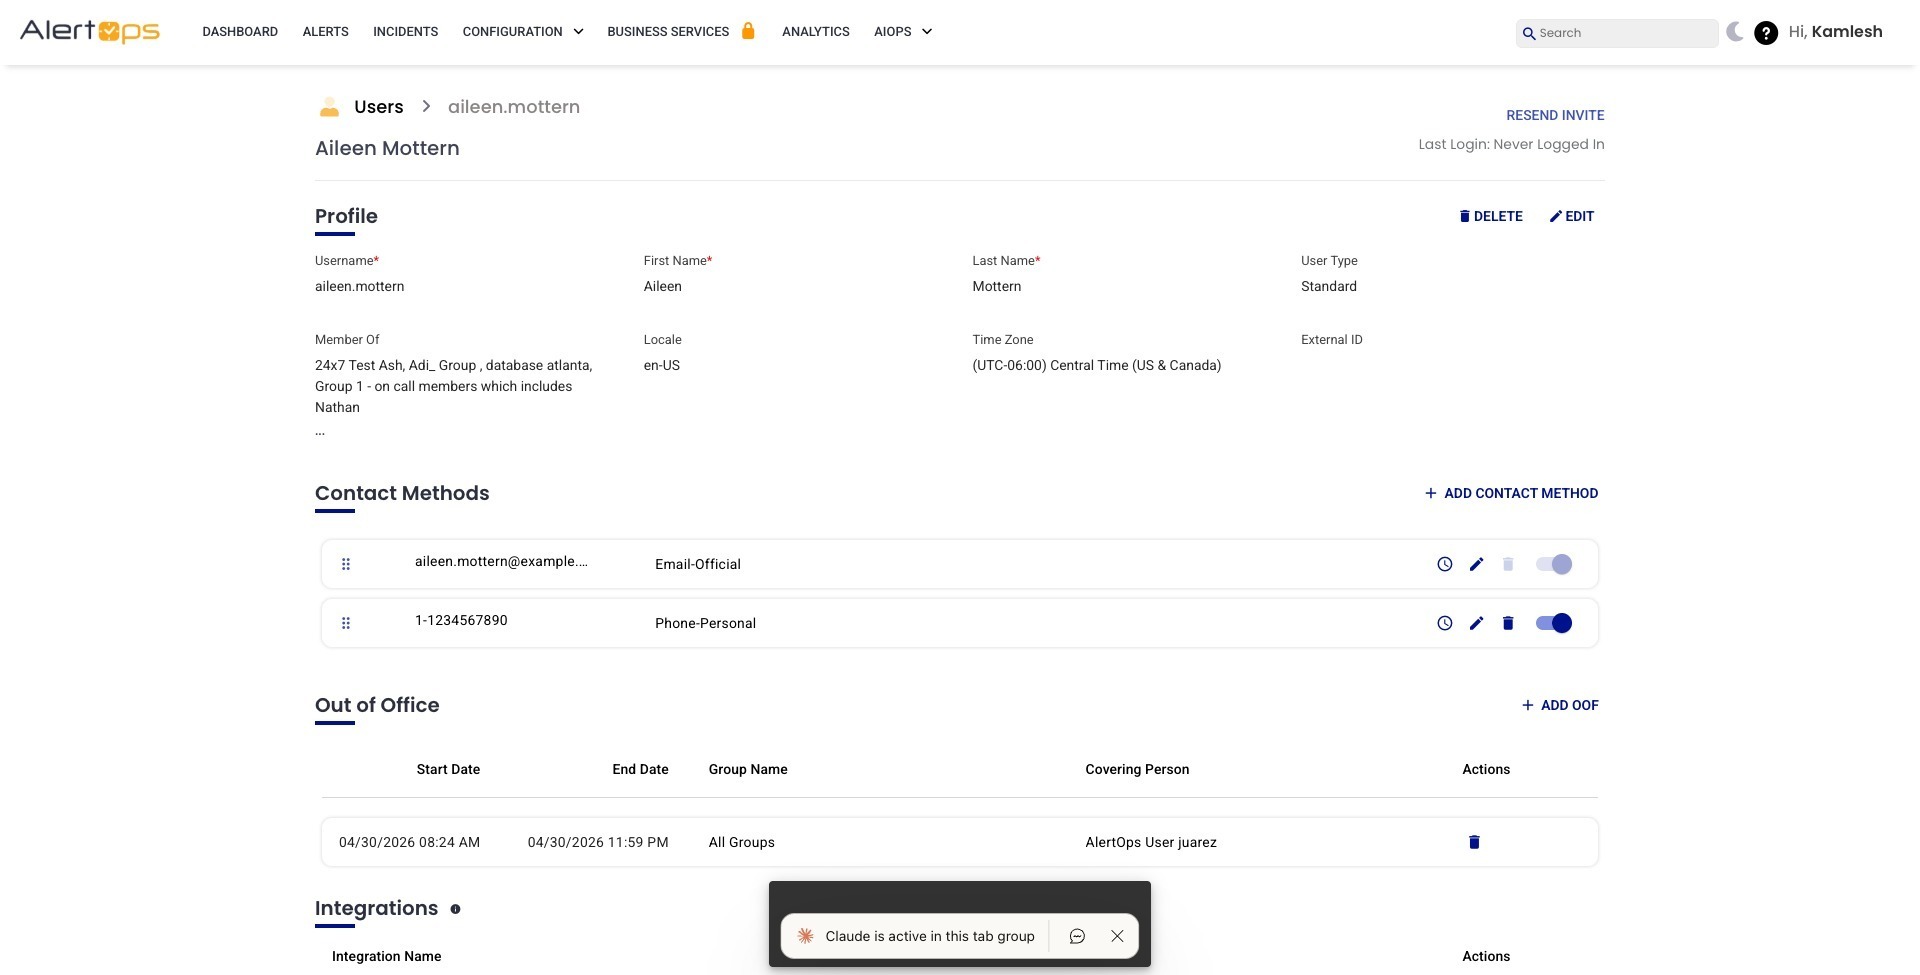
Figure 4. A saved entry on a user profile: Start Date / End Date display in MM/DD/YYYY hh:mm AM/PM format. With All Groups selected, the Group Name column shows "All Groups." The Actions column has a trash icon for deleting the entry.
Out of Office Field Reference
Relevant for Anyone filling in the dialog
|
Field |
Description |
|
Start Date |
The day the OOF takes effect. |
|
Start Hour and minute |
Two number-spinner inputs (HH and MM, separated by a colon) that set the start time. Defaults to the current hour. |
|
End Date |
The day the OOF ends. |
|
End Hour and minute |
Two number-spinner inputs that set the end time. For a full-day OOF, set this to 23:59. |
|
All Groups (toggle) |
ON (default): one Select Covering Person dropdown applies to every group the user belongs to. OFF: the dialog renders a row per group with its own Select Covering Person dropdown. |
|
Select Covering Person |
Dropdown of tenant users. Choose who should receive the absent user's alerts during the window. Repeated per group when All Groups is OFF. |
|
CANCEL / SUBMIT |
CANCEL closes the dialog without saving. SUBMIT saves the OOF and closes the dialog. |
Edit or Delete an Out of Office Entry
Relevant for Admin or the user themselves
- Saved entries appear as rows in the Out of Office section with Start Date, End Date, Group Name, Covering Person, and an Actions column.
- Click the trash icon in the Actions column to delete the entry. A delete confirmation appears before the entry is removed.
- Once an entry is deleted, the section returns to its empty "No Out of Office" state and routing for the user resumes immediately.